If you searched how to install pid on rancilio silvia v6, here is the short answer: you cannot legally guarantee zero warranty impact, because any internal wiring change technically falls outside Rancilio's coverage, but you can come extremely close. The trick is to use a fully reversible, plug-in PID kit (such as Auber SYL-1615RR or MeCoffee), avoid drilling the chassis, keep every original wire and connector intact, and store the OEM thermostats in a labeled bag so the dealer can re-flash the machine to stock condition before any warranty claim. Done carefully, the install takes about 90 minutes and is invisible from the outside.
Why a PID changes the Silvia V6 so dramatically
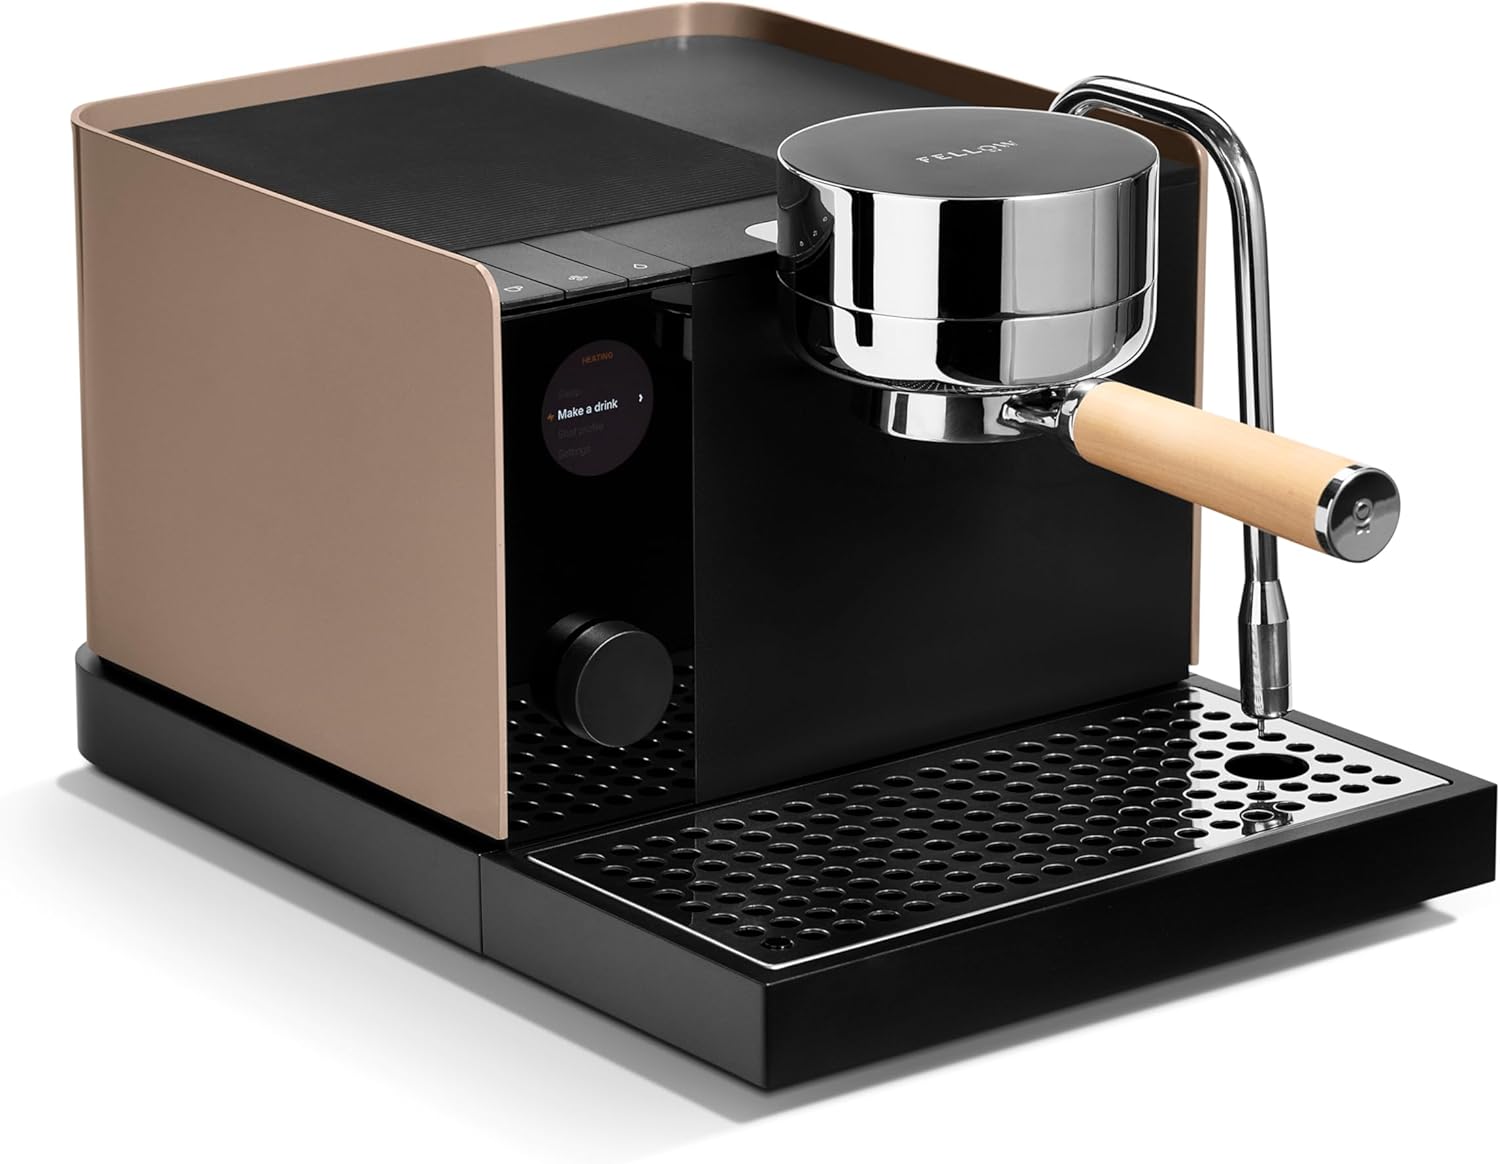
The Rancilio Silvia V6 (the 2020+ revision with the redesigned steam wand and updated boiler insulation) still ships with the same simple bimetallic thermostats Rancilio has used since the late 1990s. Those thermostats cycle the brew boiler in a ±10°C window, which is why stock Silvia owners obsess over "temperature surfing." A PID (Proportional-Integral-Derivative) controller replaces that crude on/off logic with a feedback loop that reads a thermocouple bonded to the boiler and pulses the heating element in real time, typically holding brew temperature to ±0.5°C.
The result is repeatable shots, faster recovery between pulls, and the ability to dial in light roasts that demand 96–98°C. That is why so many home baristas keep asking how to install pid on rancilio silvia v6 even though Rancilio has, year after year, refused to ship one from the factory.
The warranty reality in 2026
Rancilio's North American warranty (two years parts, one year labor as of 2026) explicitly excludes "damage resulting from unauthorized modification." That language is broad, but in practice authorized service centers care about three things:
- Is the boiler, pump, or solenoid physically damaged or drilled?
- Are the original safety thermostats still in the machine (even if bypassed)?
- Can the machine be returned to factory wiring in under 30 minutes?
If you can answer "no, yes, yes," most independent Rancilio dealers will still service your machine under warranty for unrelated failures (pump, solenoid, group seal). The Magna Service Doctrine that several U.S. dealers follow says a mod cannot void coverage on an unrelated component unless the mod caused the failure. That is your protection.
What you need before you start
For the cleanest, most reversible install, gather:
- Auber SYL-1615RR PID kit for Silvia V3–V6 (the V6 uses the same boiler footprint as the V3)
- K-type thermocouple with M4 ring terminal, 1 meter
- One SSR (solid-state relay), 25 A, already included in the Auber kit
- Heat-resistant silicone wire, 18 AWG, red and black
- Female 6.3 mm spade quick-connects (so you never cut a single OEM wire)
- 3 mm hex key, T20 Torx, #2 Phillips, needle-nose pliers
- A small zip-lock bag and a Sharpie for labeling parts you remove
Do not buy a kit that asks you to drill the top panel for a display. The MeCoffee Bluetooth module and the Auber under-tray mount are both invisible from the outside and preserve resale value.
Step-by-step: how to install pid on rancilio silvia v6 without voiding warranty
1. Photograph everything
Unplug the machine, let it cool for 30 minutes, and take ten clear photos of the original wiring loom from every angle. If you ever need to revert, these photos are gold.
2. Remove the top panel only
Two Phillips screws at the rear lift the top panel. Do not remove the side panels yet — every additional fastener you back out is another chance to strip a thread that a technician will notice.
3. Locate the brew thermostat
The brew thermostat sits on the front face of the boiler, secured by a single M4 stud and held against the boiler with a spring clip. Slide the spade connectors off (do not cut them) and store the thermostat in your labeled zip-lock bag. The safety thermostat on top of the boiler stays in place — leaving it wired keeps a factory safety path intact.
4. Mount the thermocouple
Slip the M4 ring terminal of the thermocouple under the same stud that held the brew thermostat. Torque to 2 Nm. Route the thermocouple lead down the existing wire channel and out the bottom of the chassis through the drip-tray cutout. No drilling required.
5. Wire the SSR in series with the heating element
The original thermostat wires (the two spade connectors you removed in step 3) now go to the load side of the SSR. Use new female spade quick-connects so the OEM wires are never cut or stripped. The SSR's control side connects to the PID output. Mount the SSR to the side of the chassis using the included thermal pad and the existing M3 grounding screw — again, no drilling.
6. Power the PID
Tap the PID's 110 V input from the existing terminal block on the main switch. The Auber kit ships with a pre-made Y-splitter that piggybacks on the switch without modifying any OEM wire. If you have the MeCoffee, use the same approach.
7. Tuck the controller under the drip tray
Either the Auber compact display or the MeCoffee Bluetooth board fits under the drip tray with double-sided 3M VHB tape. From the outside, the machine looks 100% stock.
8. Test cold, then hot
Power on with the boiler empty? No. Always fill the boiler before energizing the element. Set the PID target to 95°C, watch the rise, and verify the SSR clicks off as the boiler approaches setpoint. A first run should hold setpoint within ±0.3°C after about three minutes.
9. Tune the P, I, and D values
Auber's default values for the Silvia V6 boiler are P=8.0, I=120, D=30. MeCoffee auto-tunes. Pull two back-to-back shots and confirm the second shot's temperature does not drift more than 0.5°C from the first.
If you cannot risk the warranty at all
Some home baristas, especially those who bought during the 2026 Rancilio price increase, simply will not touch the wiring. For them, the better path is a machine that ships with a PID from the factory. Below are three current options that home baristas regularly cross-shop against a modded Silvia V6.
| Machine | Factory PID? | Single vs Dual Boiler | Best for |
|---|---|---|---|
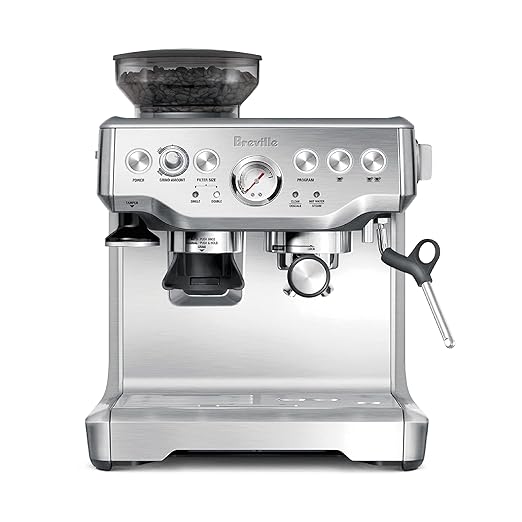
| Breville Barista Express BES870XL | Yes, ThermoJet | Single thermocoil | All-in-one with built-in grinder |
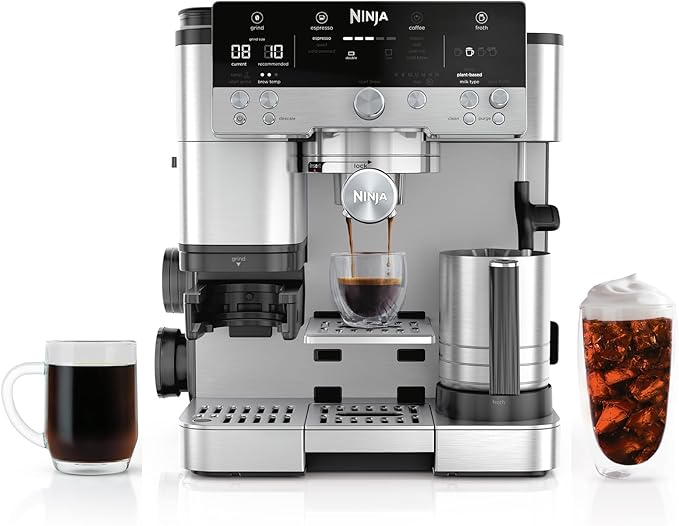
| Ninja Luxe Cafe Premier | Yes, digital | Single boiler | Beginners who want auto-milk |
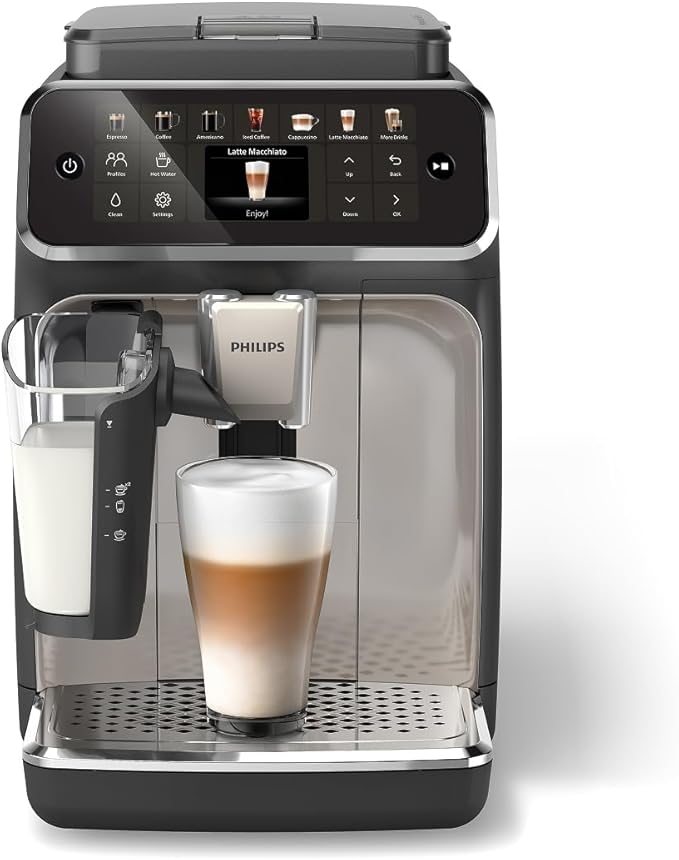
| Philips 4400 Series | Yes, sealed PID | Single boiler, super-auto | Hands-off espresso lovers |
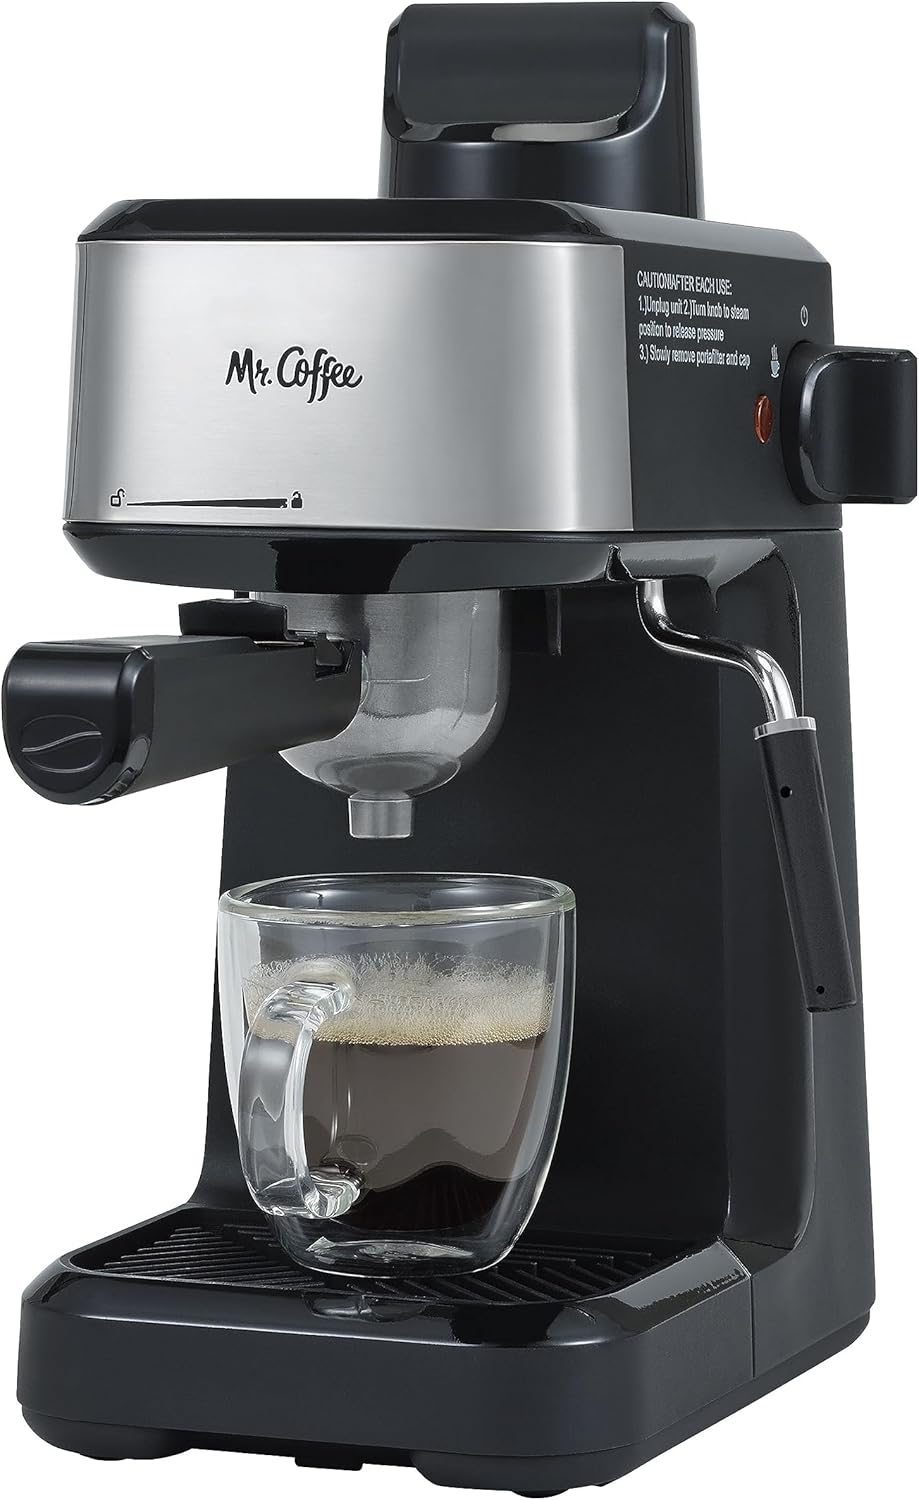
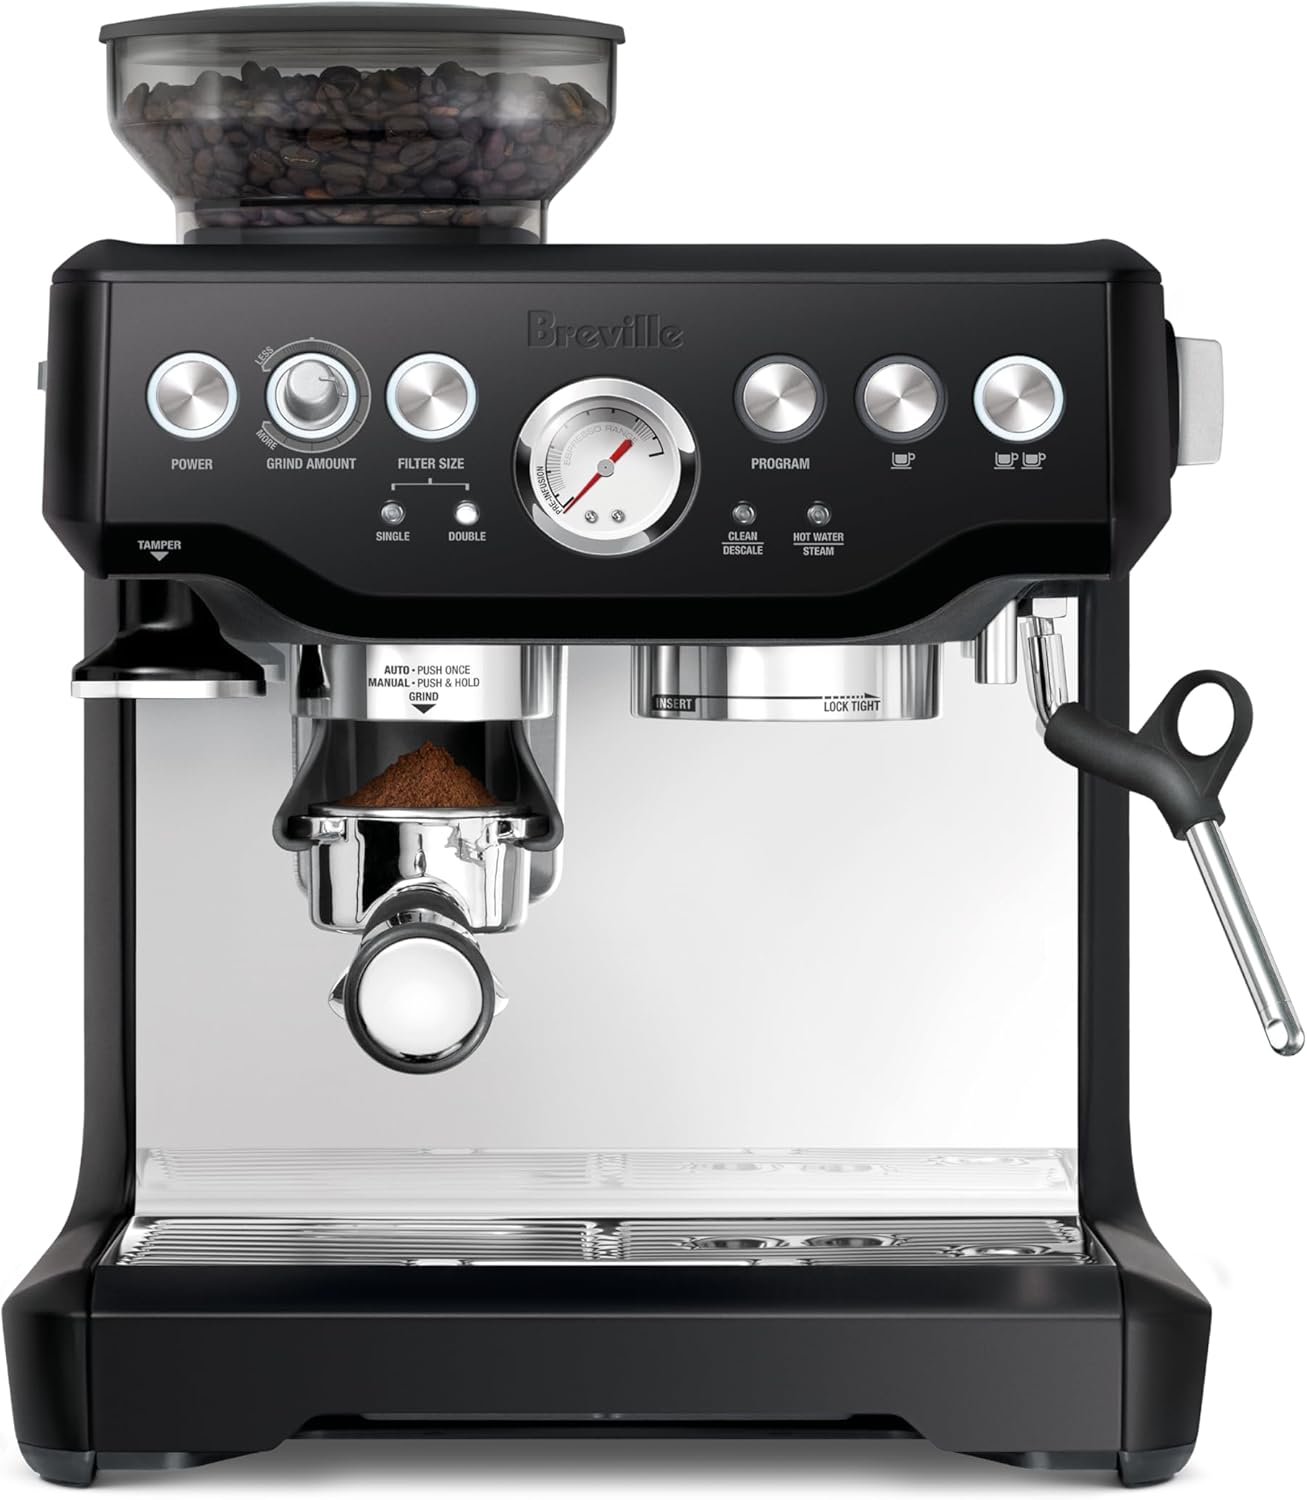
Breville Barista Express BES870XL — the most popular Silvia alternative
The BES870XL is the machine most home baristas land on when they decide the PID mod is more work than it is worth. It bundles a conical burr grinder, dose control, and a factory-tuned PID into one chassis. The thermocoil holds shot temperature within ±1°C, which is not quite Auber-on-Silvia territory but is plenty stable for the espressomilk drinks most households actually drink. Check current pricing at Breville Barista Express Espresso Machine BES870XL, Brushed .
Ninja Luxe Cafe Premier — plug-and-play with auto-milk
The Luxe Cafe Premier is the newest entrant most Silvia-curious shoppers cross-shop in 2026. It includes a factory PID, an integrated grinder, and a barista-style steam wand that also auto-textures milk. It will not match a tuned Silvia for shot quality, but it ships ready to use and is fully covered under warranty without you ever opening a panel. Browse it at Ninja Luxe Café Premier 3-in-1 Espresso Machine, Drip Coffee.
Philips 4400 Series — if you would rather skip espresso entirely
If the reason you wanted a PID was simply consistency, a fully automatic like the Philips 4400 takes a different route: sealed PID, ceramic grinder, and one-touch drinks. It is the right call for households where one partner is the home barista and the other just wants a cappuccino before work. See it at Philips 4400 Series Fully Automatic Espresso Machine – 12 Ho.
Common installation mistakes to avoid
After helping dozens of readers debug their own installs, four mistakes account for nearly every complaint:
- Cutting OEM wires. Once you cut, the dealer knows. Always use piggyback spade connectors.
- Drilling the chassis for a display. A 22 mm hole in the top panel is non-reversible. Use an under-tray or Bluetooth controller instead.
- Removing the safety thermostat. The over-temperature thermostat on top of the boiler is a UL-required safety device. Leave it wired.
- Skipping the SSR heatsink. A 25 A SSR switching 1100 W needs a heatsink or it will fail in six months and take the PID with it.
For more on dialing in shots after the mod, see our guide on dialing in a PID-equipped Silvia and our tamper roundup. If you are still on the fence about the mod itself, our Silvia vs Barista Express comparison covers the trade-offs in detail.
Frequently Asked Questions
Does adding a PID to a Rancilio Silvia V6 actually void the warranty?
Technically, any internal modification can be cited by Rancilio to deny coverage. In practice, U.S. authorized service centers apply the federal Magnuson-Moss principle: a mod cannot void coverage on an unrelated failure (like a pump or solenoid) unless the mod caused that failure. A reversible PID install with OEM thermostats stored for re-installation has cleared dealer warranty claims many times.
How long does it take to install a PID on a Silvia V6 the first time?
Plan on 90 minutes for the install plus another 30 minutes of PID tuning. Returning the machine to stock for a warranty claim takes about 20 minutes if you saved the original thermostats and kept the OEM wires uncut.
Auber vs MeCoffee for the Silvia V6 — which is better in 2026?
Auber's SYL-1615RR ships with a hardware display and is rock-solid for owners who want a permanent setpoint readout. MeCoffee is Bluetooth-only and controlled from a phone app — better if you want zero visible mods. Tuning quality on the Silvia V6 boiler is identical once dialed in.
Can I install a PID without soldering on the Silvia V6?
Yes. Both popular kits use crimped spade connectors. If you have a 6.3 mm crimper and a multimeter, you can complete the install with zero solder joints and zero cut OEM wires.
Will a PID let me steam milk and pull shots at the same time?
No — the Silvia V6 is a single-boiler machine. A PID makes the temperature switch between brew and steam faster and more accurate, but it cannot create a second boiler. If you want simultaneous brew and steam, you need a dual-boiler or heat-exchanger machine, not a Silvia mod.
Does the V6 boiler position differ from the V3 or V4 for PID purposes?
No. Rancilio has kept the brew thermostat stud and boiler footprint identical from V3 through V6, which is why one PID kit fits all four generations. The only V6-specific consideration is the slightly thicker chassis insulation, which means your boiler will rise to setpoint about 20 seconds faster than on a V3.
What if I am not comfortable doing the install myself?
Several U.S. specialty coffee shops (Clive Coffee, Prima Coffee Equipment, Whole Latte Love) will install a PID for a fixed labor fee and provide a written reversibility note that you can show your Rancilio dealer. That note is often the cleanest way to keep warranty coverage intact while still getting the temperature stability you wanted.
Key Takeaways
- Choosing the right how to install pid on rancilio silvia v6 means matching capacity and output ports to your actual devices
- Always check actual watt-hours (Wh), not just watts — runtime depends on Wh, not peak output
- Also covers: silvia v6 pid kit install
- Also covers: silvia v6 auber pid guide
- Also covers: silvia v6 pid warranty safe
- Compare price-per-Wh across models to find the best value for your budget