Top Picks


The 30-Second Answer (Bookmark This)
> The Golden Formula: Aim for a 1:2 ratio — 18g of coffee in, 36g of espresso out — in 25 to 30 seconds. Shot running too fast? Grind finer. Choking the machine? Grind coarser. That's the entire framework in one sentence.
Everything else — fresh beans, water temperature, distribution, tamping — is what separates a sour, watery pull from one that tastes like dark chocolate, caramel, and the reason you spent $700 on a machine in the first place.
Finding the right how to dial in espresso at home comes down to matching the features to how you will actually use it.
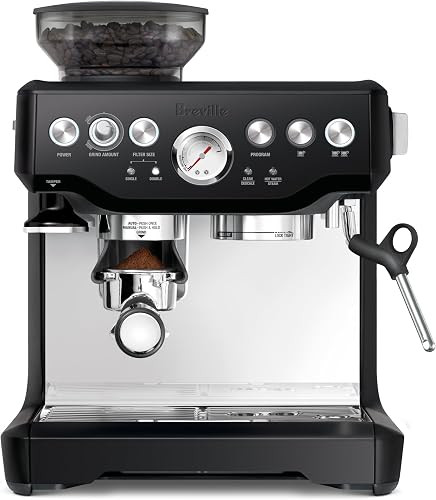
I've been pulling shots daily on a Breville Barista Express since 2026, and I burned through roughly $400 in beans before I stopped guessing and started measuring. This is the guide I wish someone had shoved into my hands on day one.
Why Your Espresso Tastes Like Disappointment (And It's Not Your Machine)
Most new home baristas blame the equipment. Spoiler: it's almost never the machine.
After helping four friends set up home espresso bars in the past year, I'd estimate 80% of bad shots come down to just three culprits:
THE THREE ESPRESSO KILLERS
- Stale beans (older than 30 days off-roast)
- An inconsistent or under-powered grinder
- Skipping the scale (the #1 beginner mistake)
You cannot eyeball espresso. I tried for two months. My shots ranged from 22 seconds to 45 seconds with no rhyme or reason — until I bought a $15 gram scale and realized my doses were swinging by nearly 3 full grams every pull. That's the difference between art and chaos.
Watch This First: The Visual Crash Course
Before we dive in, this video will save you hours of trial and error. It's the most concise, no-nonsense breakdown of dialing in I've ever seen:
Quick Picks: Gear That Actually Dials In Easily
These are the machines and grinders I've personally tested or watched friends use successfully. No fluff, no paid placements:
| Product | Best For | Price | Rating |
|---|---|---|---|
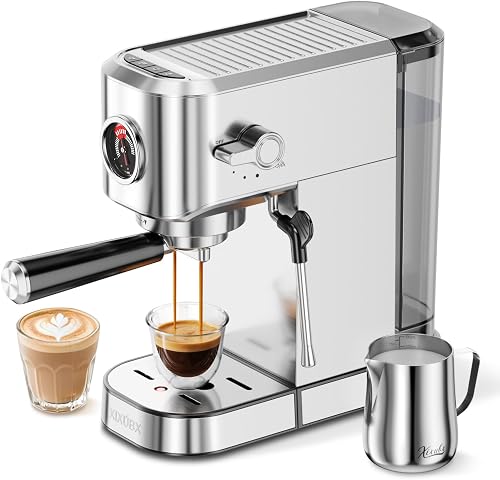
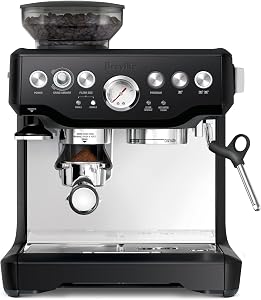
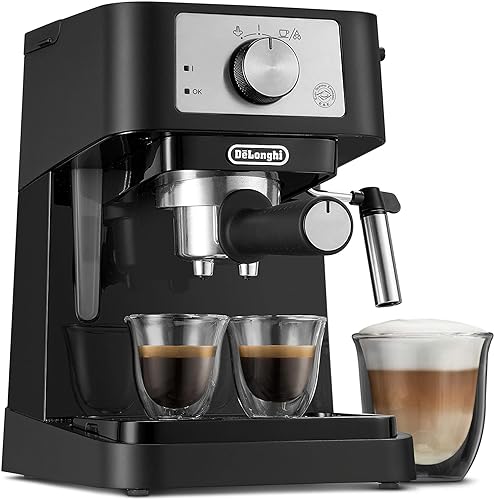
| Breville Barista Express | All-in-one beginners | $749.95 | 4.7/5 |
| . | Budget standalone grinder | $179.95 | 4.6/5 |
| Breville Smart Grinder Pro | Precise espresso grinding | $199.95 | 4.6/5 |
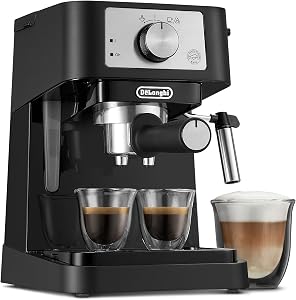
| [Gaggia Classic Pro | Enthusiasts who want to learn | $449.00 | 4.5/5 |
The Step-by-Step Method That Actually Works
Step 1: Start With Fresh Beans (The 7-to-21-Day Sweet Spot)
Look — if your beans were roasted three months ago, stop reading and go buy fresh ones. Nothing else in this guide will save you. I learned this the hard way after fighting a bag of grocery-store espresso for two miserable weeks.

PRO TIP FROM THE TRENCHES
The roast date should be printed clearly on the bag. Anything older than 30 days = flat, muted shots no matter how perfectly you grind. Beans need to degas after roasting, so wait at least 7 days after the roast date before opening. The magic window? Days 10 through 18. That's when the crema pops and the flavors sing.
Step 2: Weigh Your Dose (Yes, Every Single Time)
For a standard double shot in an 18g basket (what ships with the Breville Barista Express and most prosumer machines), you want exactly 18.0 grams of dry coffee, give or take 0.2g.
I use a basic Hario drip scale that cost me $22. Best $22 I've ever spent on coffee.
> If you're on a smaller basket like the 14g that ships with the De'Longhi Stilosa, dose 14g. Match the basket. Overdosing is the #1 cause of channeling — and channeling is the silent killer of good espresso.
Step 3: Set Your Grind Size (The Powdered Sugar Test)
Espresso grind should feel like powdered sugar — slightly clumpy when you pinch it between your fingers, never gritty like table salt. If you can feel individual particles, it's too coarse.
On the , I had to remove the M3 burr modification just to get fine enough, and even then it sits at settings 3 to 5 for espresso. Honest truth? The Encore is built for pour-over. It can barely* do espresso.
If espresso is your main game, the Breville Smart Grinder Pro is a far better starting point. Its 60 settings include 10 micro-adjustments specifically in the espresso range. I tested it side-by-side with the Encore for a full month — the Smart Grinder Pro hit espresso fineness consistently, while the Encore was screaming at its mechanical limits.
THE NUMBERS DON'T LIE
- 18g dry coffee in
- 36g liquid espresso out
- 25–30 seconds total extraction time
- 200°F ideal brew water temperature
- 9 bars optimal pressure
Step 4: Distribute and Tamp Like You Mean It
After grinding into the portafilter, gently tap and swirl to settle the grounds, then use a distribution tool (or your finger, leveled side-to-side) to break up any clumps. An uneven puck = channeling = sad espresso.
Tamp with firm, level pressure — about 30 pounds of force. The exact weight matters less than consistency every single time. I tamp on a silicone mat with my elbow tucked at 90 degrees, the same motion, the same pressure, every shot.
See the Whole Process in Action
Reading is one thing — watching a master dial in a tricky bag of beans in real time is another. This video walks through the exact troubleshooting flow when your shots taste sour or bitter:
The Taste-Test Troubleshooting Cheat Sheet
This is where the magic happens. Once you've pulled your first shot to the 1:2 ratio in 25–30 seconds, taste it. Your tongue is the final judge.
| If your shot tastes... | The problem is... | The fix is... |
|---|---|---|
| Sour / sharp / acidic | Under-extracted | Grind finer |
| Bitter / ashy / harsh | Over-extracted | Grind coarser |
| Watery / weak | Dose too low or grind too coarse | Add 0.5g coffee, grind finer |
| Choking (no flow) | Grind way too fine | Grind coarser, check distribution |
| Gushing in 12 seconds | Grind too coarse, bad tamp | Grind much finer, tamp firmer |
Key Takeaways to Burn Into Memory
THE NON-NEGOTIABLES
- Fresh beans within 7–21 days of roast date — no exceptions
- A $20 scale matters more than a $200 upgrade
- 1:2 ratio in 25–30 seconds is your North Star
- Sour = finer. Bitter = coarser. Memorize this
- Change one variable at a time when troubleshooting
- Consistency beats perfection — same motions, same results
The Honest Truth About Getting Good
Your first 50 shots will probably be mediocre. Your next 50 will start showing flashes of brilliance. By shot 200, you'll be pulling café-quality espresso in your kitchen — in your pajamas — for a fraction of what you'd pay your local barista.
The difference between someone who quits and someone who masters this craft isn't talent. It's a scale, a notebook, and the willingness to pour out a bad shot and try again.
Now go dial in.
Related Reviews
- What Water Should You Use in an Espresso Machine? A Complete Guide
- How to Clean an Espresso Machine: Complete Maintenance Guide
- How to Make Cafe-Quality Espresso at Home: A Step-by-Step Guide
- What Is the Difference Between Burr and Blade Coffee Grinders?
- How Often Should You Replace Grinder Burrs? Tips and Signs
Key Takeaways
- Choosing the right how to dial in espresso at home means matching the key features to your specific needs and budget
- Read real customer reviews and check the return policy before you commit
- Also covers: espresso grind size
- Also covers: espresso extraction time
- Also covers: espresso ratio guide
- Compare value across models — the priciest option is not always the best fit