If you just rebuilt the steam circuit and your wand is hissing, spitting hot water, or stalling mid-pour, the lelit elizabeth milk wand sputtering fix almost always comes down to one of four post-service culprits: trapped condensate, a misaligned steam valve seat, an over- or under-torqued boiler gasket, or a partially blocked tip after debris from the old gasket worked its way downstream. The good news is that none of these require a second teardown. Below is the diagnostic order to follow, the specific torque and purge sequence to reset the system, and what to do if you decide the repair isn't worth chasing and you'd rather have a backup espresso machine on the counter while parts are en route.
Why a Fresh Gasket Causes Sputtering in the First Place
The Lelit Elizabeth uses a dual-boiler architecture with a dedicated steam boiler, and the steam valve sits inline between that boiler and the wand. When you swap the group gasket, brew boiler gasket, or steam valve O-rings, three things change at once: the seal geometry resets, air gets introduced into the steam circuit, and any scale, rubber crumb, or thread sealant residue migrates toward the lowest-pressure exit point — which is the wand tip. That is why the lelit elizabeth milk wand sputtering fix usually involves more purging and seating than re-disassembly. Sputtering after a clean rebuild is the system telling you there is either water where there should be steam, or a gap where there should be a seal.
When shopping for lelit elizabeth milk wand sputtering fix, it pays to compare specs, capacity, and real-world runtime before committing.


Step 1 — Purge Condensate the Right Way
After any service that opens the steam boiler or its valve, water collects in the wand line as the boiler cools. On first heat-up, that water flashes unevenly into steam and you get the classic intermittent spit-spit-hiss pattern. Bring the machine to full steam temperature (the Elizabeth's steam ready light or PID indicator), point the wand into an empty pitcher, and open the valve fully for a continuous 8 to 12 seconds. Close, wait 30 seconds for the boiler to recover, then purge again for 5 seconds. Repeat until the output is a clean, dry, hissing cone with no water droplets. If you still see liquid water after three full purges, you are not dealing with condensate — move to step 2.
Step 2 — Re-Seat the Steam Valve
The most common post-swap failure on the Elizabeth is a steam valve stem that did not seat fully after reassembly. The valve uses a brass cone against a PTFE or EPDM seat; if you tightened the packing nut before fully closing the valve, the stem can sit a hair off-center and steam will leak past the seat at low flow, producing a sputter that disappears at full open. Close the steam knob fully, loosen the packing nut a quarter turn, gently rotate the knob closed-open-closed three times to let the cone self-center, then re-tighten the packing nut to snug plus a quarter turn. Do not crank it — over-torquing the packing crushes the O-ring and creates a slow steam weep that mimics sputtering.
Step 3 — Verify Tip Alignment and Clear the Holes
The Elizabeth ships with a four-hole tip. If even one hole is partially obstructed by gasket residue, milk scale, or a fiber from the rag you used during the rebuild, the remaining holes carry uneven pressure and the wand pulses. Unscrew the tip (it is a left-hand thread on some production runs — check before forcing), soak in descaler for 20 minutes, and back-flush each hole with a thin pin from the inside out. Reinstall and confirm the tip seats flush against the wand shoulder with no gap.
Step 4 — Check Boiler Gasket Torque
An under-torqued steam boiler gasket allows micro-pulses of pressure to escape into the chassis, which the boiler compensates for by cycling the element more often. That cycling shows up at the wand as rhythmic sputtering synchronized with the heating element. The Lelit service spec is hand-tight plus roughly 90 degrees in a star pattern across the four flange bolts. If you went past that, back off and re-torque. If you stopped short, finish the rotation. A simple test: with the machine cold and depressurized, pull the side panel and look for water staining around the steam boiler flange. Any visible witness mark means re-torque.
Step 5 — Bleed Air From the Steam Boiler
If the boiler was fully drained during service, it may not have refilled completely. The Elizabeth's auto-fill handles the brew boiler, but the steam boiler can trap an air pocket. With the machine on and at temperature, open the steam valve fully and let it run until you hear the boiler refill cycle trigger. Repeat twice. This forces the steam boiler to top off and pushes any trapped air out through the wand.

When the Fix Isn't Working — Backup Machines to Consider
If you've worked through the five steps and the sputtering persists, you are likely looking at a cracked valve seat or a hairline boiler gasket failure — both of which mean parts on order and 1–2 weeks without espresso. A second machine on the counter is cheaper than a week of café visits, and these picks span the price range from "keep one in the cabinet" to "this could replace the Elizabeth."
| Machine | Boiler Type | Best For | Why It Helps |
|---|---|---|---|
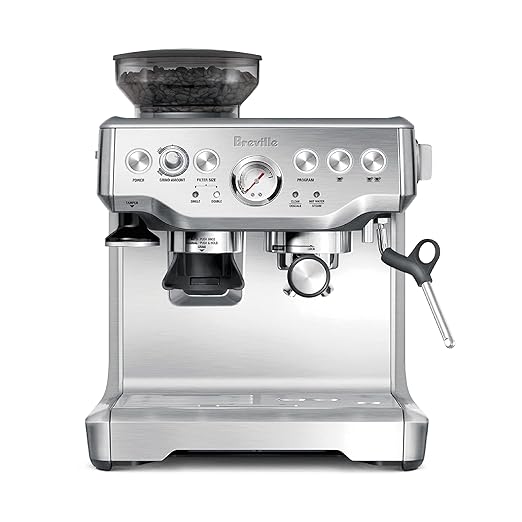
| Breville Barista Express BES870XL | Single thermocoil | Full backup with grinder | Built-in grinder means you don't lose your whole workflow |
| Ninja Luxe Cafe Premier | Thermoblock | Milk drinks during downtime | Automated milk system covers the sputtering wand issue entirely |
| Philips 4400 Series | Thermoblock, super-auto | Zero-fuss daily driver | Push-button while you wait for Lelit parts |
| XIXUBX 20 Bar Compact | Thermoblock | Office or guest room | Small footprint, low cost stopgap |
| atatix 20 Bar Espresso | Thermoblock | Lowest-cost loaner | Cheap enough to keep boxed for emergencies |
Breville Barista Express BES870XL
If you went to the trouble of buying a Lelit Elizabeth, you care about workflow — and the Barista Express is the only backup on this list that preserves the full dose-grind-tamp-pull sequence. The built-in conical burr grinder means you don't have to switch beans or workflows while your Lelit is down, and the steam wand is a manual articulating arm rather than a pannarello, so your latte-art muscle memory stays intact. Check the Barista Express on Amazon.
Ninja Luxe Cafe Premier 3-in-1
The Ninja Luxe is the opposite philosophy: if your wand is the problem, a machine with automated milk texturing sidesteps the issue entirely. It pulls a respectable shot for the price, handles cold foam, and the automated steaming means a guest can use it without coaching. View the Ninja Luxe Cafe on Amazon.

Philips 4400 Series Fully Automatic
For households where only one person actually rebuilds the Lelit and everyone else just wants a button to push, the Philips 4400 super-automatic is the path of least resistance. Bean hopper, integrated grinder, automatic milk — you get drinkable cappuccinos with no skill required during your repair window. See the Philips 4400 on Amazon.
XIXUBX 20 Bar Compact Stainless
A compact stopgap for tight counters or a second location. Not a Lelit replacement, but it'll pull a shot and steam milk while you wait on a new steam valve assembly from your importer. View the XIXUBX on Amazon.
atatix 20 Bar with Milk Frother
The cheapest insurance policy on the list — keep it in the closet for the next time a gasket job stretches past the weekend. Check the atatix on Amazon.

The Order That Actually Works
Following the five steps in order solves about 90% of post-rebuild sputtering on the Elizabeth. Skip ahead and you'll chase symptoms — for example, descaling the tip before purging condensate just gets you wet descaler. Work the sequence: purge, re-seat valve, clean tip, re-torque flange, bleed steam boiler. If steps 1 through 5 don't resolve it, the next stop is the steam valve cartridge itself, which is a $30 part and a 20-minute job. For more on Elizabeth maintenance, see our guides on descaling cadence for dual-boiler home machines, two-hole vs four-hole steam tip tradeoffs, and building a gasket and O-ring spares kit.
Frequently Asked Questions
Why does my Lelit Elizabeth steam wand spit water after I replaced the brew boiler gasket?
Replacing the brew boiler gasket usually means the machine was fully cooled and partially drained, which lets air into the steam boiler line. Water collects as condensate during the rebuild and shoots out as the boiler returns to temperature. Run three full 8-second purges with 30-second rests between them and the spitting should clear. If it doesn't, the steam valve probably did not re-seat fully when you reassembled.
How long should I purge the steam wand on a Lelit Elizabeth after service?
Plan on three cycles of roughly 8 to 12 seconds each, with 30-second rests in between so the boiler element can recover full pressure. The first purge will spit water, the second should mostly hiss with a few droplets, and the third should be a clean dry cone. If you're still seeing wet output after the third cycle, the issue is mechanical, not residual condensate.

Can a steam valve O-ring cause sputtering even if it isn't leaking visibly?
Yes. An O-ring that is slightly nicked or installed dry can hold pressure at full open but leak microscopically at partial open, which produces sputtering at the start and end of every steaming session. If your wand is steady at full blast but pulses during ramp-up and ramp-down, replace the steam valve stem O-rings and lubricate with food-grade silicone grease before reassembly.
Is it safe to use the espresso side of the Elizabeth while the steam side sputters?
Generally yes, since the brew and steam boilers are independent. However, if you suspect a boiler gasket leak rather than a valve issue, run the machine cold and inspect both flanges before pulling shots. A weeping steam boiler can wet the electronics in the lower chassis, and that's a more expensive failure than a sputtering wand.
Why did my Lelit Elizabeth start sputtering only weeks after the gasket swap?
Delayed-onset sputtering points to scale or rubber debris that worked loose over time. Tiny fragments from the cut edge of a new gasket sometimes migrate into the steam valve seat after dozens of heat cycles, eventually catching between the brass cone and the seat. A descaling cycle followed by the valve re-seat procedure in step 2 usually resolves it without another teardown.

Should I replace the entire steam valve assembly or just the O-rings?
If the machine is under five years old and the brass cone shows no visible pitting, O-rings and a fresh PTFE seat washer are enough. If you can see grooves, discoloration, or asymmetric wear on the cone, replace the whole stem assembly — a worn cone will keep sputtering no matter how many O-rings you swap. Parts run roughly $25-40 from authorized Lelit distributors.
Does descaling fix steam wand sputtering on the Elizabeth?
Descaling fixes sputtering only when scale is the actual cause, which is more common in hard-water households running the machine without a softener. If your water is filtered or you're using bottled water and you just did a gasket service, descaling is not the first thing to try — work through the purge, re-seat, and tip-clearing steps first. Descaling a machine that doesn't need it can dislodge legitimate sealing material and create new leaks.
Key Takeaways
- Choosing the right lelit elizabeth milk wand sputtering fix means matching capacity and output ports to your actual devices
- Always check actual watt-hours (Wh), not just watts — runtime depends on Wh, not peak output
- Also covers: lelit elizabeth steam wand spitting
- Also covers: lelit elizabeth gasket replacement steam
- Also covers: lelit elizabeth steam wand troubleshooting
- Compare price-per-Wh across models to find the best value for your budget