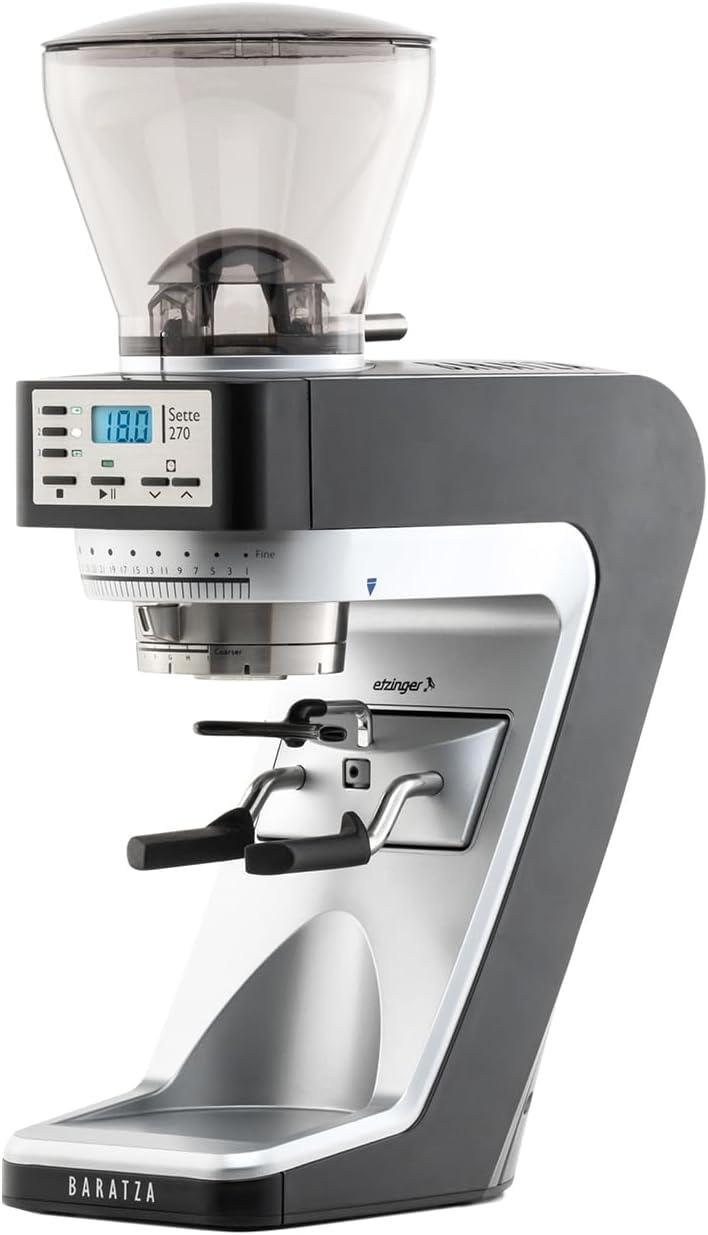
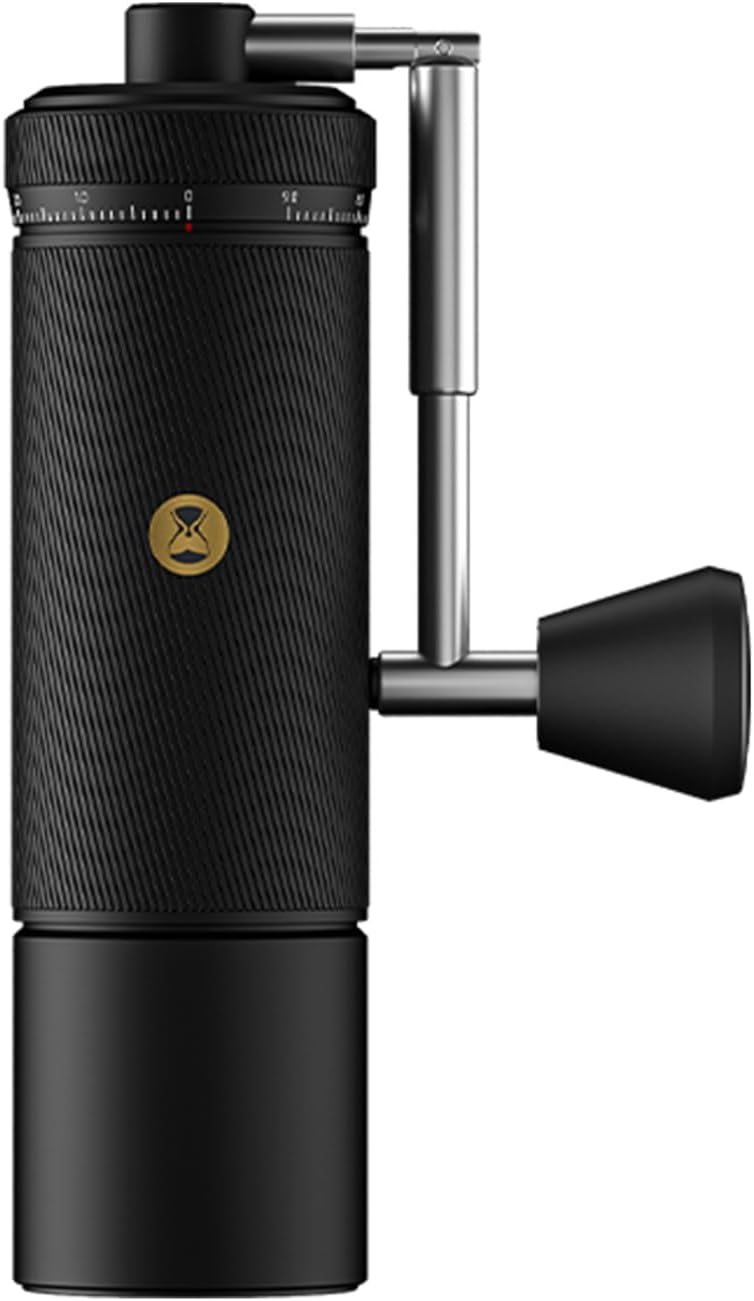
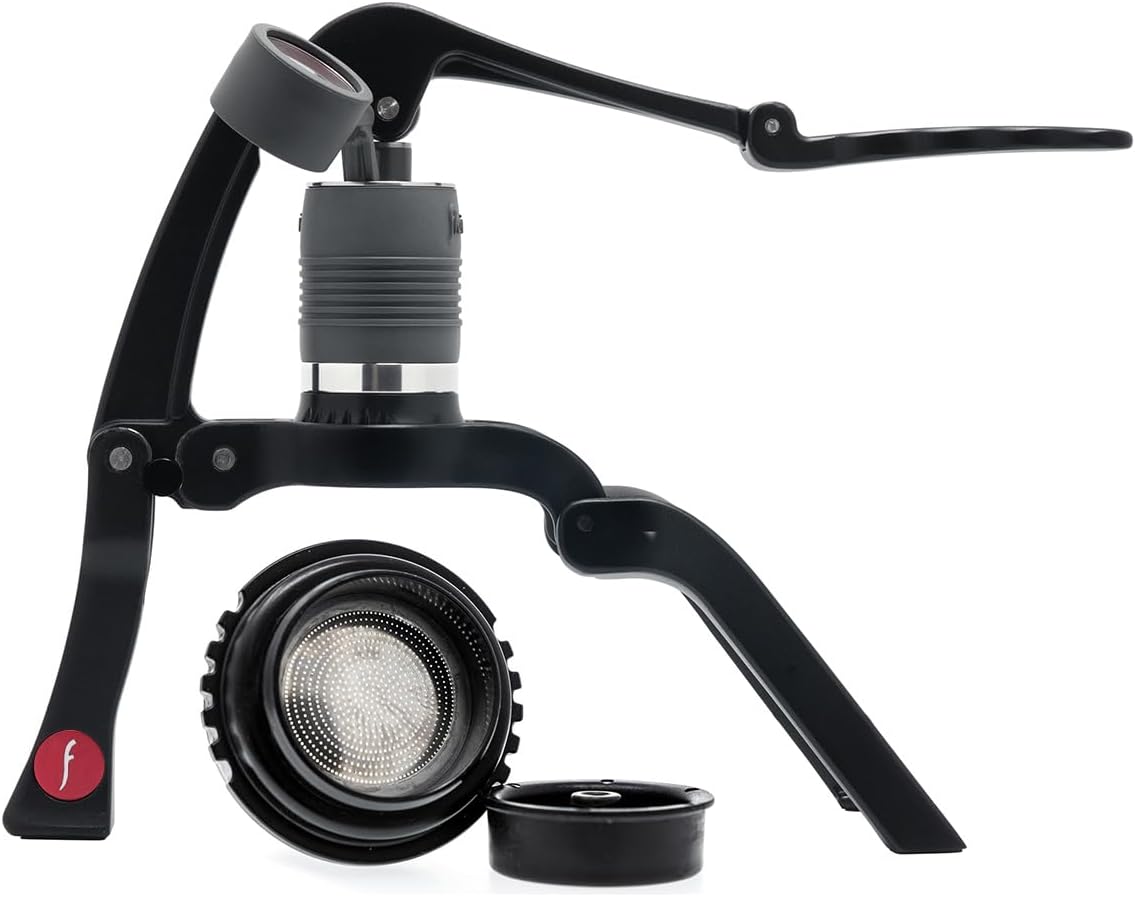
If you already pull a daily batch brew and want to add real espresso without buying two grinders, the Eureka Mignon Crono for batch brew and espresso is the most sensible single-grinder bridge you can put on a home counter in 2026. Its stepless worm-gear adjustment lets you spin from a coarse 600-micron filter setting to a 250-micron espresso fine in seconds, so first-time baristas can keep their morning drip routine and still pull a clean 1:2 shot after breakfast. The 50 mm flat steel burrs are conservative enough that you do not need barista reflexes to keep grounds in the basket, yet sharp enough to give you real flavor separation when you start chasing dialed shots on a Breville or Ninja entry machine.
This guide walks through why the Crono punches above its price for dual-workflow home baristas, how to dial it in without wasting a kilo of beans on day one, and which espresso machines pair cleanly with it as your first add-on. Year referenced throughout is 2026 because Eureka revised the hopper geometry and the bellows seal on this generation, and the pairing logic changed with it.
The best Eureka Mignon Crono for batch brew and espresso for your situation depends on how you plan to use it and where.
Why the Crono Fits the “Batch Brew First, Espresso Next” Path
Most first-time baristas come from a Moccamaster, OXO, or Ratio batch brewer. You already understand ratios (typically 1:16 or 1:17), bloom timing, and bean freshness. What you don’t have yet is a feel for the much narrower margin of espresso, where a half-number of grind size separates a sour 38-second choke from a gushing 14-second blonde. The Crono solves the bridge problem in three specific ways.
First, the worm-gear adjustment is fine enough at the espresso end that you can micro-tune in roughly 10-micron increments, which is what you need once you start chasing under-extracted edges out of a light roast. Second, the bean hopper is small (about 300 g) and pops off cleanly, so swapping a filter blend for an espresso blend between brew sessions is a 20-second job, not a five-minute disassembly. Third, the motor runs at lower RPM than the bigger Eureka Specialita, which keeps the burrs from heating up during back-to-back brew-then-espresso mornings — an underrated factor when you are pulling for two people before work.
It is also the cheapest Eureka with the company’s ACE (Anti-Clumps and Electrostaticity) treatment, which matters more than spec sheets suggest. If you are coming from a blade grinder or a Baratza Encore, the absence of static cling and the lack of grounds skidding across the counter will be the first thing you notice.
How to Dial In Both Workflows Without Wasting Beans
The trap new baristas fall into is treating the Crono like a single-purpose grinder and then re-adjusting from scratch every time they switch modes. Don’t. Pick two reference points on the collar and mark them with a paint pen or a piece of tape.
For batch brew on a flat-bottom basket, start at roughly the 4 o’clock position on the collar with medium-roast beans and aim for a 4:30 to 5:30 total brew time on a 1 L batch. For espresso, your starting point is usually around the 12:30 to 1 o’clock position with a fresh medium-dark roast, targeting an 18 g in, 36 g out shot in 28 to 32 seconds. Mark both. Now switching workflows costs you one cleared burr chamber (single dose 5 g of throwaway beans) and a collar twist.
The other dial-in tip most first-timers miss: the Crono needs about a 200-gram seasoning period out of the box before the espresso end of the range becomes consistent. Run your cheapest beans through it on the first weekend, pull a few practice shots, and don’t judge the grinder until that break-in is done.
Best Espresso Machines to Pair With the Crono
The Crono is grinder-side capable far beyond entry-level espresso machines, which is exactly why it’s a smart first purchase — you can upgrade the machine later without re-buying the grinder. For a first espresso machine added to a batch-brew setup, four options dominate the conversation in 2026.
| Machine | Best For | Pressure | Built-in Grinder | Learning Curve |
|---|---|---|---|---|
| Breville Barista Express BES870XL | Hands-on dial-in feel | 15 bar | Yes (bypass with Crono) | Moderate |
| Ninja Luxe Cafe Premier 3-in-1 | Guided shots, milk drinks | 19 bar | Yes | Easy |
| Philips 4400 Series Fully Automatic | Push-button daily drivers | 15 bar | Yes (sealed) | Very easy |
| atatix 20 Bar with Milk Frother | Budget testing the espresso waters | 20 bar | No | Easy |
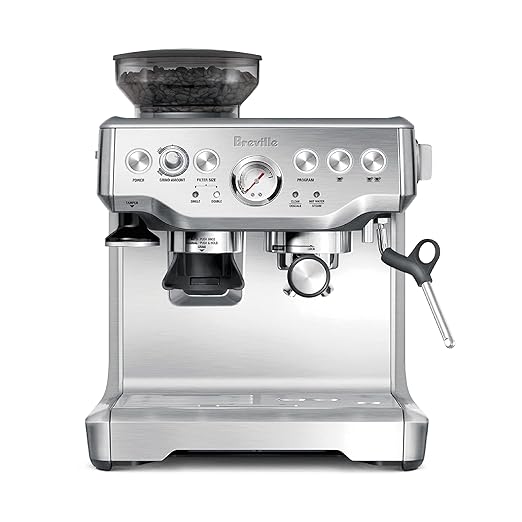
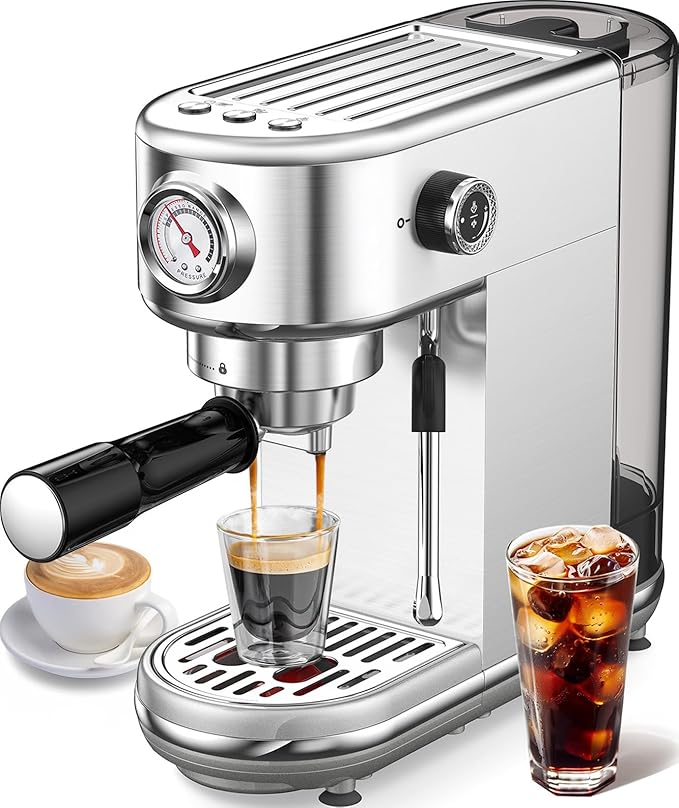
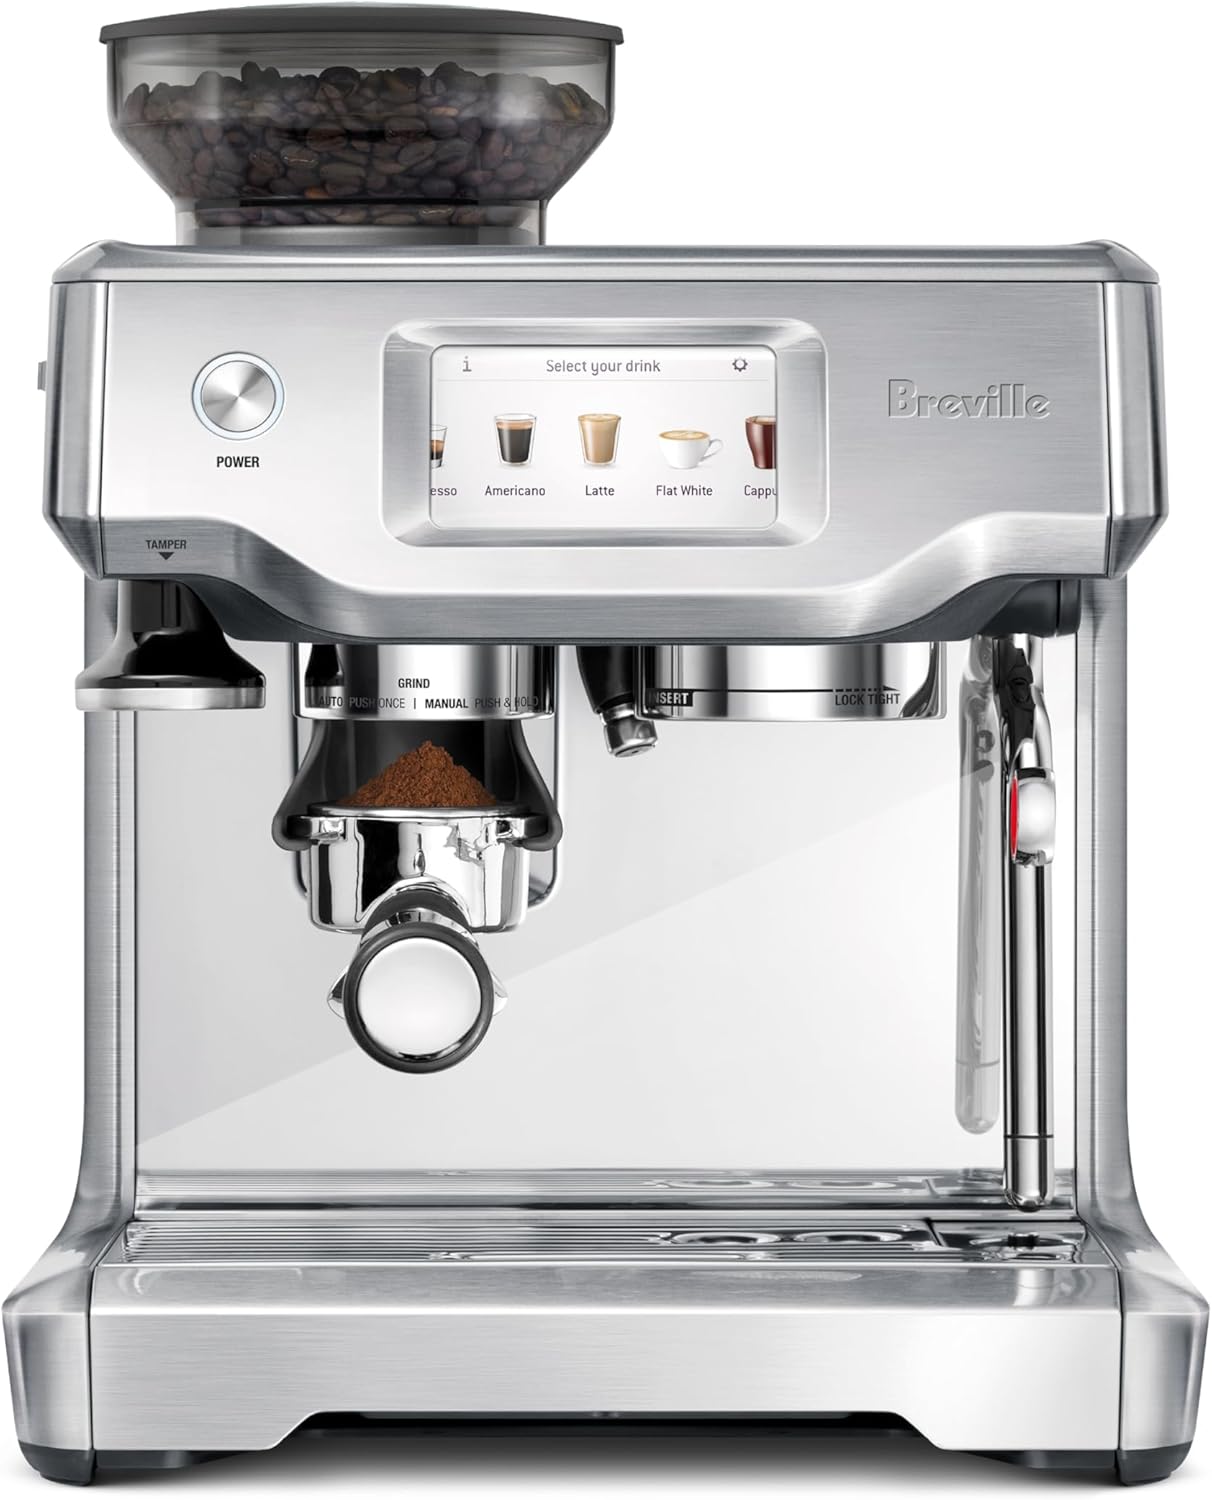
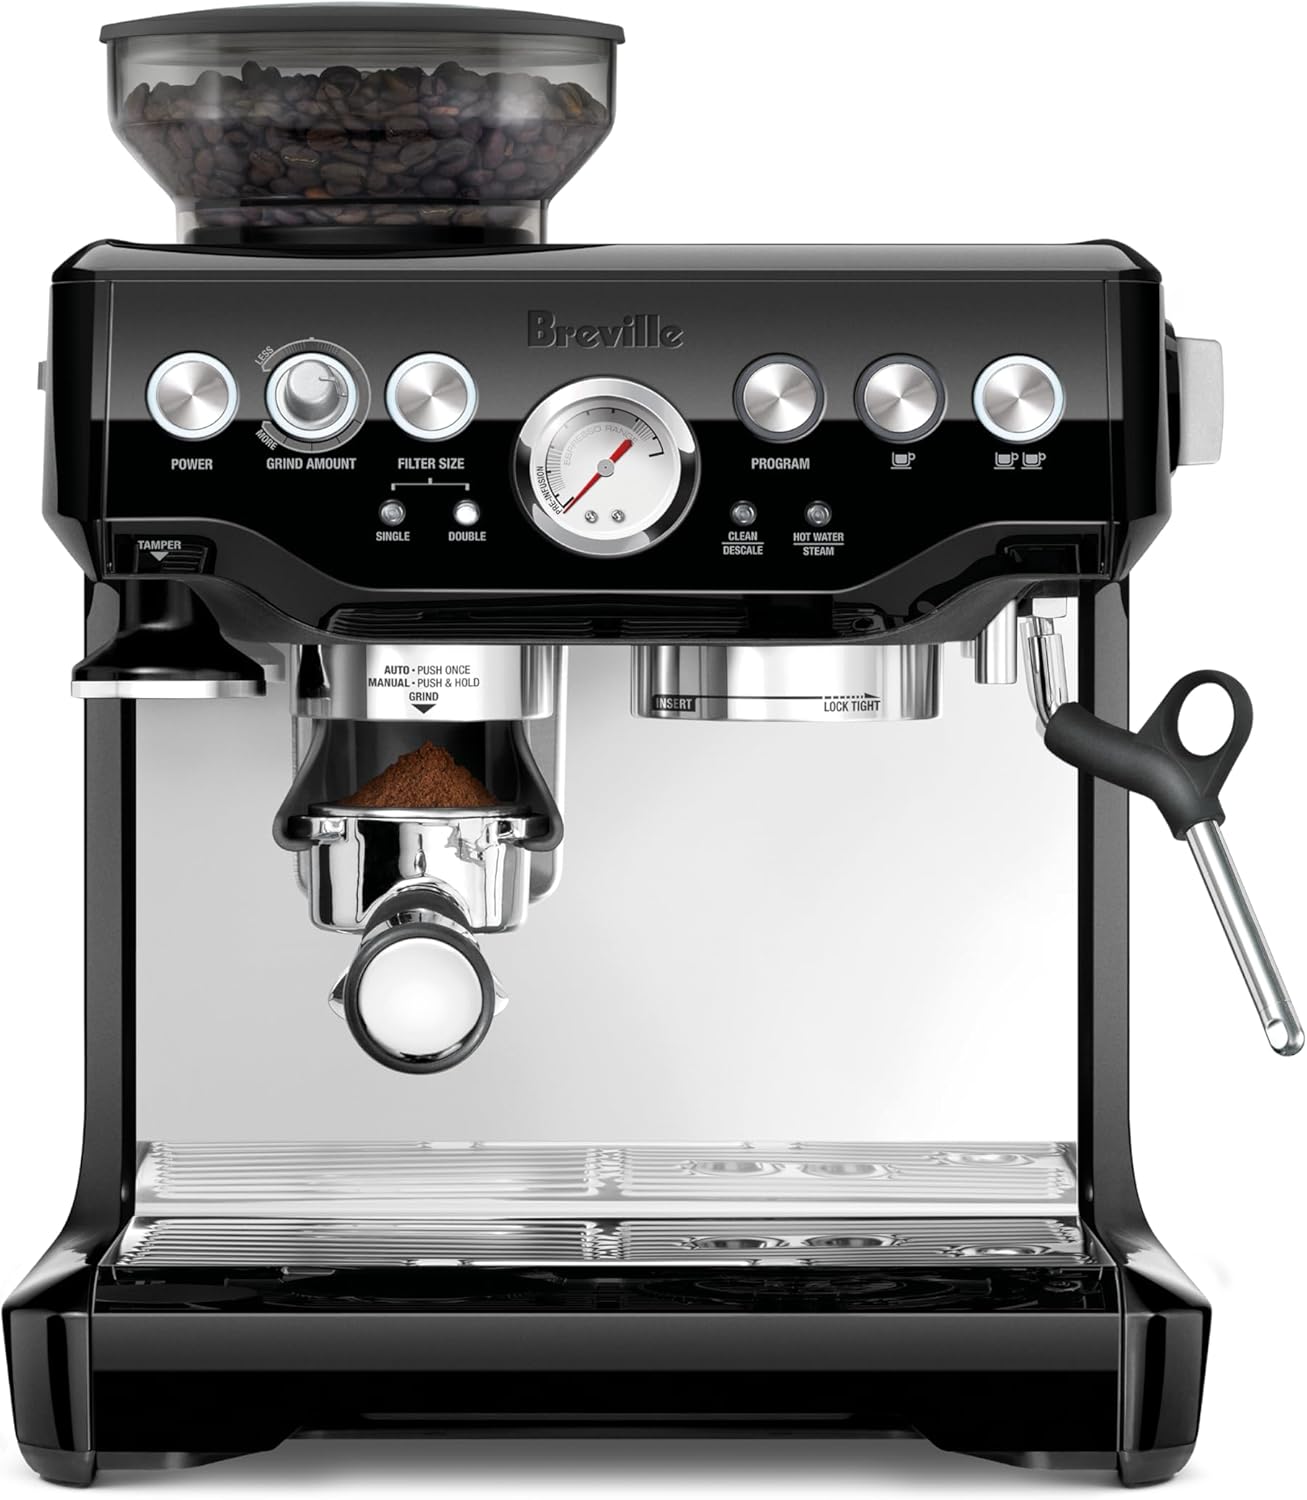
Breville Barista Express BES870XL — Best Match for the Crono Workflow
The Barista Express is the canonical first espresso machine for batch brew converts, and the Crono is the upgrade path Breville themselves would recommend if they sold a standalone grinder. Yes, the BES870XL has its own built-in conical burr grinder — use it for the first month, then start bypassing it and grinding into the portafilter directly from the Crono once you understand the basics. The PID-controlled thermocoil, 15-bar pump, and steam wand mirror Eureka’s precision philosophy, and the dose-control workflow translates directly. Check the current price at Breville Barista Express Espresso Machine BES870XL, Brushed .
Ninja Luxe Cafe Premier 3-in-1 — Best for Mixed Households
If your batch-brew habit has to coexist with a partner who wants oat-milk lattes and zero learning curve, the Ninja Luxe Cafe Premier is the right answer. It does drip, espresso, and milk steaming with assisted dial-in that gives you visual feedback during the shot — an underrated training tool for someone whose only prior coffee skill is timing a pour-over bloom. The Crono outclasses the built-in grinder for espresso, but the Ninja’s assist mode genuinely helps you understand what is happening inside the puck. View it at Ninja Luxe Café Premier 3-in-1 Espresso Machine, Drip Coffee.
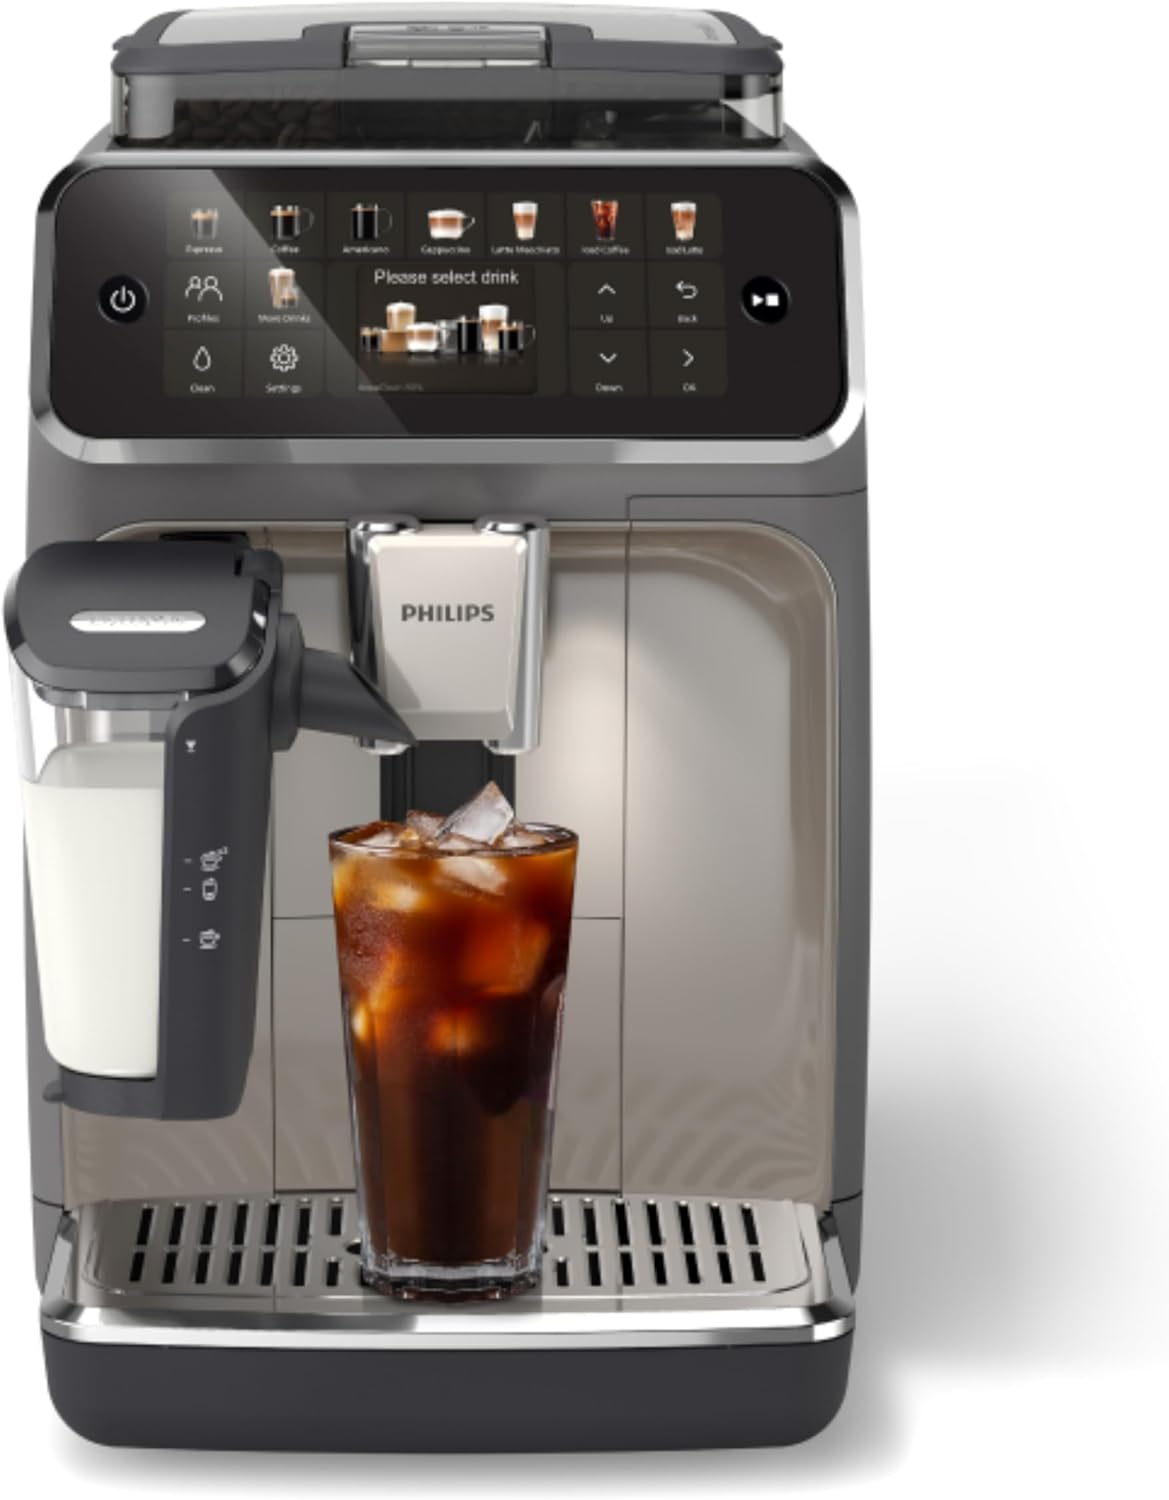
Philips 4400 Series Fully Automatic — The “Insurance Policy” Pick
The Philips 4400 is a different philosophy from the Crono — it is a sealed bean-to-cup superauto, which means you cannot feed it grounds from the Crono. So why pair them? Because a lot of households end up wanting both: a push-button espresso for weekday rushes and a manual rig for weekend craft brewing. Use the Crono with a manual lever or a Breville for craft sessions, and keep the Philips for the 6:45 AM “just give me caffeine” moments. See the 4400 at Philips 4400 Series Fully Automatic Espresso Machine – 12 Ho.
atatix 20 Bar Espresso Machine — Budget Sandbox
Not everyone wants to spend Breville money on an unproven habit. The atatix 20 Bar with milk frother is the way to validate whether espresso actually sticks before committing to a $700 machine. Paired with the Crono, even this entry-level unit can pull a recognizable shot — the grinder is doing the heavy lifting on extraction. If you outgrow it, sell it; the Crono stays. Available at atatix Espresso Machine with Milk Frother, 20 Bar Pressure E.
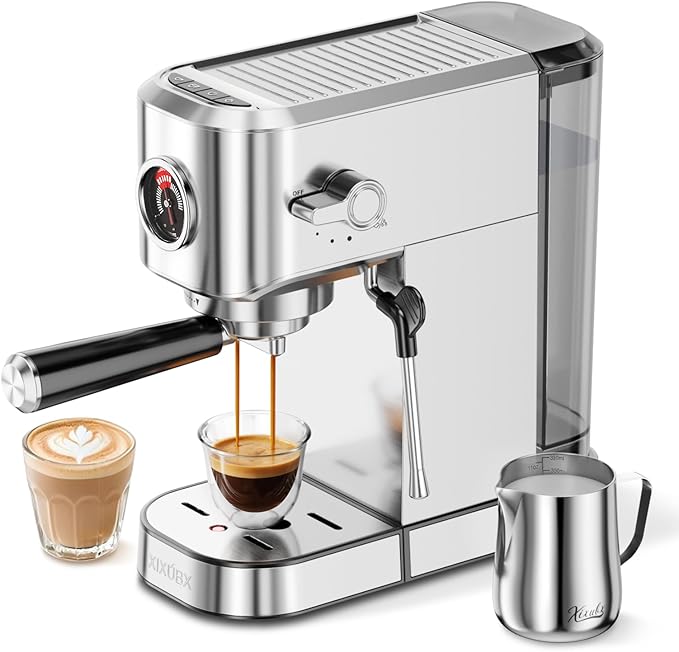
XIXUBX 20 Bar Compact — Smallest Footprint Option
For apartment kitchens where the Crono already eats most of the counter, the XIXUBX 20 Bar Compact is the smallest credible espresso machine you can pair with it. The shots are less forgiving than the Breville and there is no PID, but with a precision grinder upstream you can hide a lot of machine flaws. Find it at XIXUBX 20 Bar Espresso Machine, Compact Stainless Steel Espr.
The First-Month Workflow That Actually Works
Week one: don’t touch espresso. Run only batch brew through the Crono and learn how the collar position maps to brew time on your kettle or drip machine. This builds muscle memory for the adjustment range before you add the much narrower espresso variable.
Week two: pull espresso shots only, with a kitchen scale under the cup and a timer. Don’t make milk drinks yet. Aim for 18 g in / 36 g out / 28-32 seconds and adjust the collar one mark at a time when you miss the time window. Resist the urge to change beans — same bag, different grind, until you understand cause and effect.
Week three: switch back and forth daily between batch and espresso. This is where most baristas quit and buy a second grinder; the Crono is engineered so you don’t have to. Use your marked reference points, single-dose 5 g of purge beans between workflows, and accept that the first shot after a brew-mode session may need a quick tweak.
Week four: start milk steaming, latte art, or whatever your espresso machine adds. By now the grinder is invisible — which is what a good grinder is supposed to be.
For more on workflow sequencing, see our guides on single-grinder dual-workflow setups, Eureka Mignon Specialita vs Crono comparison, and when to bypass the Breville built-in grinder.
Frequently Asked Questions
Is the Eureka Mignon Crono good enough for espresso, or is it really just a filter grinder?
The Crono’s 50 mm flat steel burrs and stepless worm-gear adjustment make it fully capable of espresso, not just a filter compromise. It will not match the Specialita or Atom for absolute clarity in light-roast espresso, but for medium and medium-dark roasts on a home espresso machine, it produces shots that most home baristas can’t distinguish from much pricier grinders.
How long does it take to switch the Crono from batch brew to espresso settings?
About 30 seconds in practice: twist the collar to your marked espresso reference point, single-dose 5 g of purge beans to clear the previous setting, then dose your espresso shot. If you mark your reference points on day one, this becomes second nature within a week.
Do I need a separate grinder for batch brew if I get the Crono for espresso?
No — the Crono’s adjustment range explicitly covers both. People buy second grinders when they are running a busy household where the constant collar swapping becomes a workflow tax, not because the Crono can’t handle both grinds. For one or two users, a single Crono is enough.
Can I use the Crono with the Breville Barista Express even though that machine has its own grinder?
Yes, and many baristas do. Bypass the built-in grinder by removing the hopper grind chute and grinding directly into the Breville portafilter from the Crono. You will get noticeably better espresso, particularly with lighter roasts, because the Crono’s burr geometry is more refined than the Breville’s conical burrs.
What’s the difference between the Crono and the Specialita for a first-time barista?
The Specialita has a faster motor, a digital timer, and slightly larger burrs — it’s the right pick if you know you’ll commit to espresso seriously. The Crono is the right pick if you’re bridging batch brew and espresso, want a smaller hopper for fresher bean rotation, and prefer manual control over digital dosing. For first baristas adding espresso to existing batch brew, the Crono is the better starting point.
Will the Crono work with pressurized portafilter baskets that come with budget espresso machines?
Yes, and it’s actually overkill for them — pressurized baskets mask grinder differences. If you’re using a budget machine like the atatix or XIXUBX with its stock pressurized basket, the Crono will still produce visibly better espresso, but you’ll only unlock its full potential after upgrading to a non-pressurized (single-walled) basket.
How loud is the Crono compared to a typical home grinder, and does it matter for early-morning batch brew?
The Crono runs at lower RPM than most home grinders in its class and is noticeably quieter than the Breville Smart Grinder Pro or any blade grinder. It’s still a burr grinder, so it’s not silent, but for a typical 30-gram batch brew dose you’re looking at about 15 seconds of moderate noise — quieter than your batch brewer’s heating element in many cases.
Key Takeaways
- Choosing the right Eureka Mignon Crono for batch brew and espresso means matching capacity and output ports to your actual devices
- Always check actual watt-hours (Wh), not just watts — runtime depends on Wh, not peak output
- Also covers: Mignon Crono review home barista
- Also covers: Crono vs Specialita stepped
- Also covers: Eureka Crono pour over and espresso
- Compare price-per-Wh across models to find the best value for your budget